Ch 4: Painting
Photoshop CS6 Essentials
By Scott Onstott
Ch 4: Painting
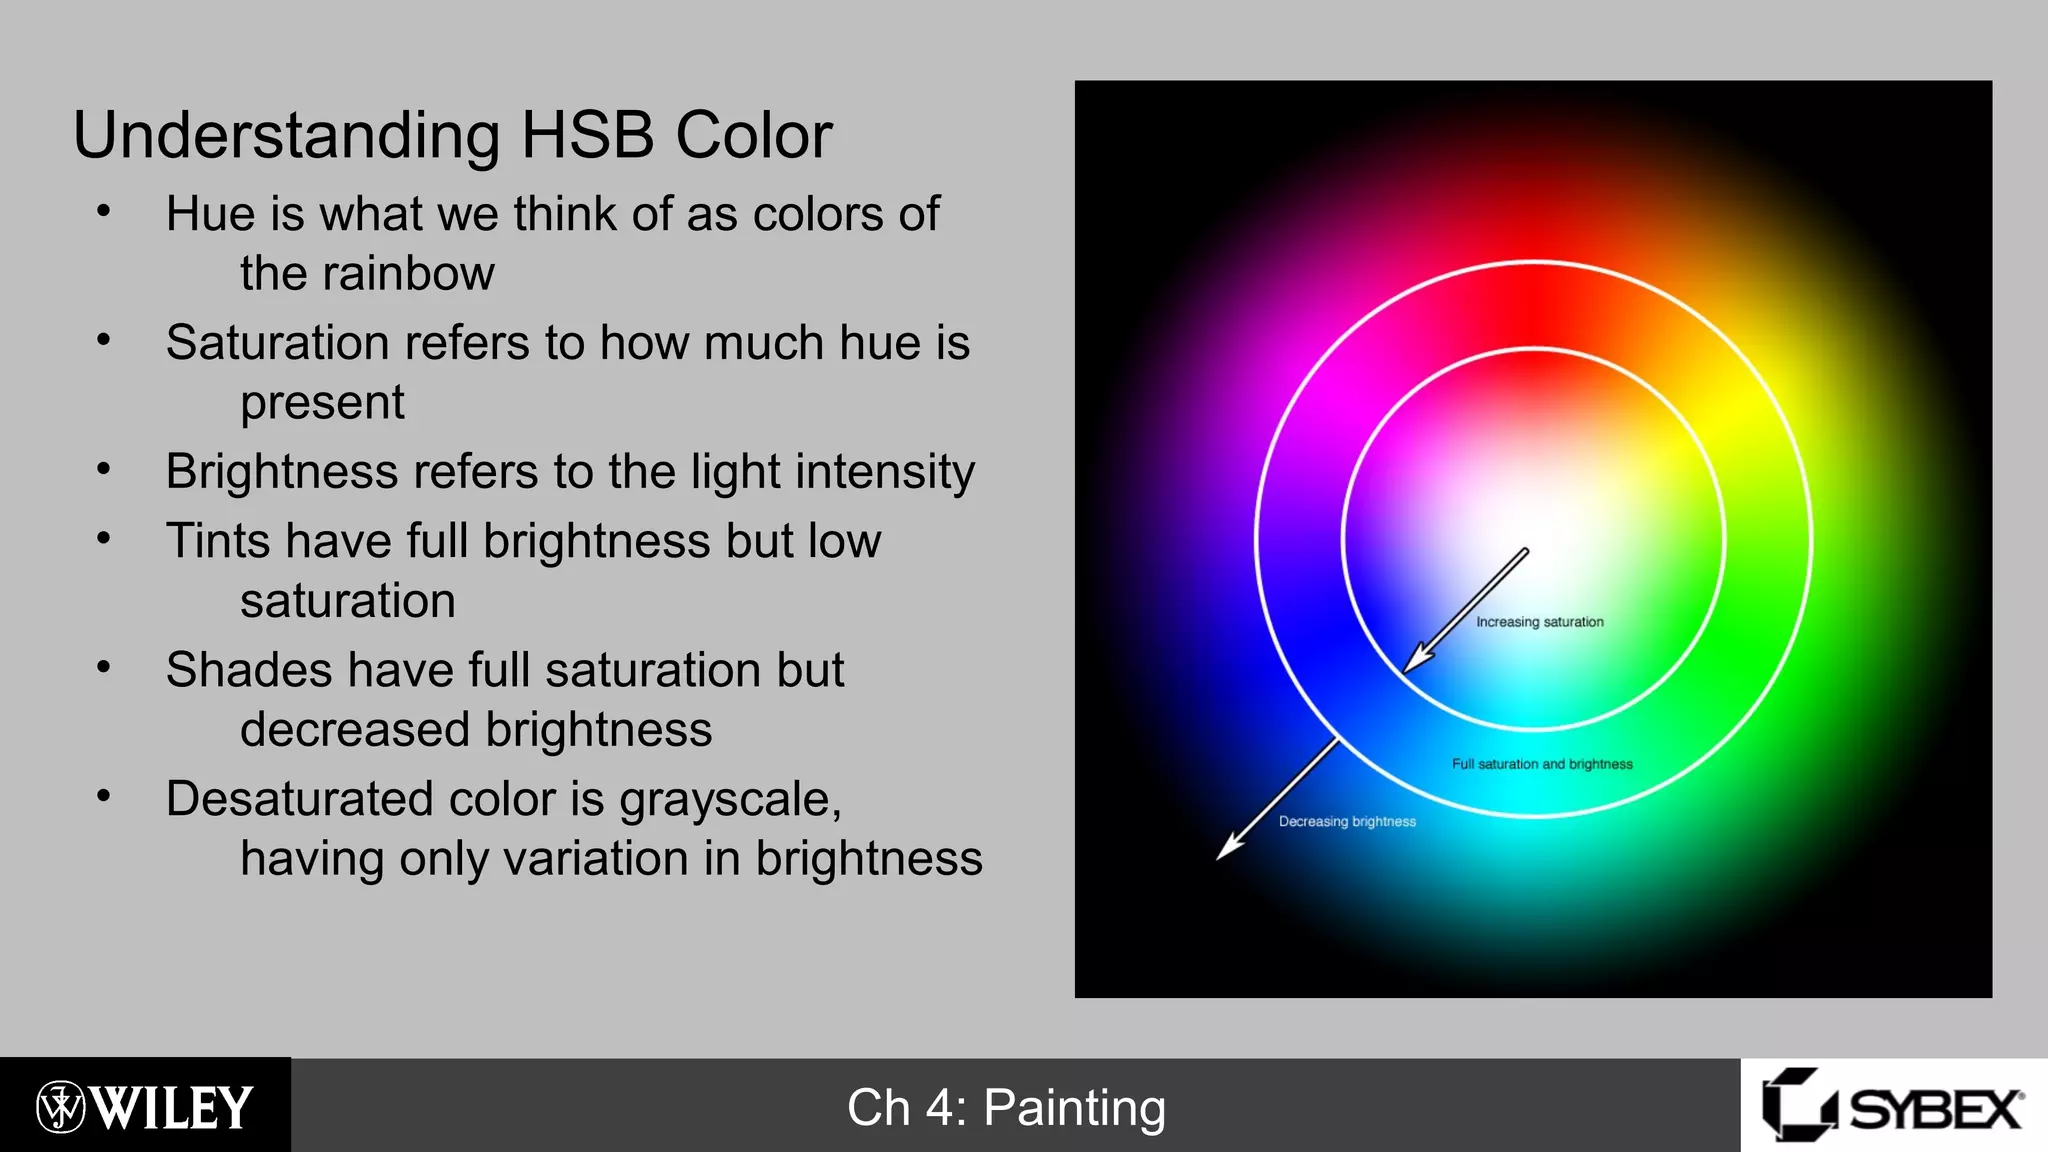
Understanding HSB Color
• Hue is what we think of as colors of
the rainbow
• Saturation refers to how much hue is
present
• Brightness refers to the light intensity
• Tints have full brightness but low
saturation
• Shades have full saturation but
decreased brightness
• Desaturated color is grayscale,
having only variation in brightness
Ch 4: Painting
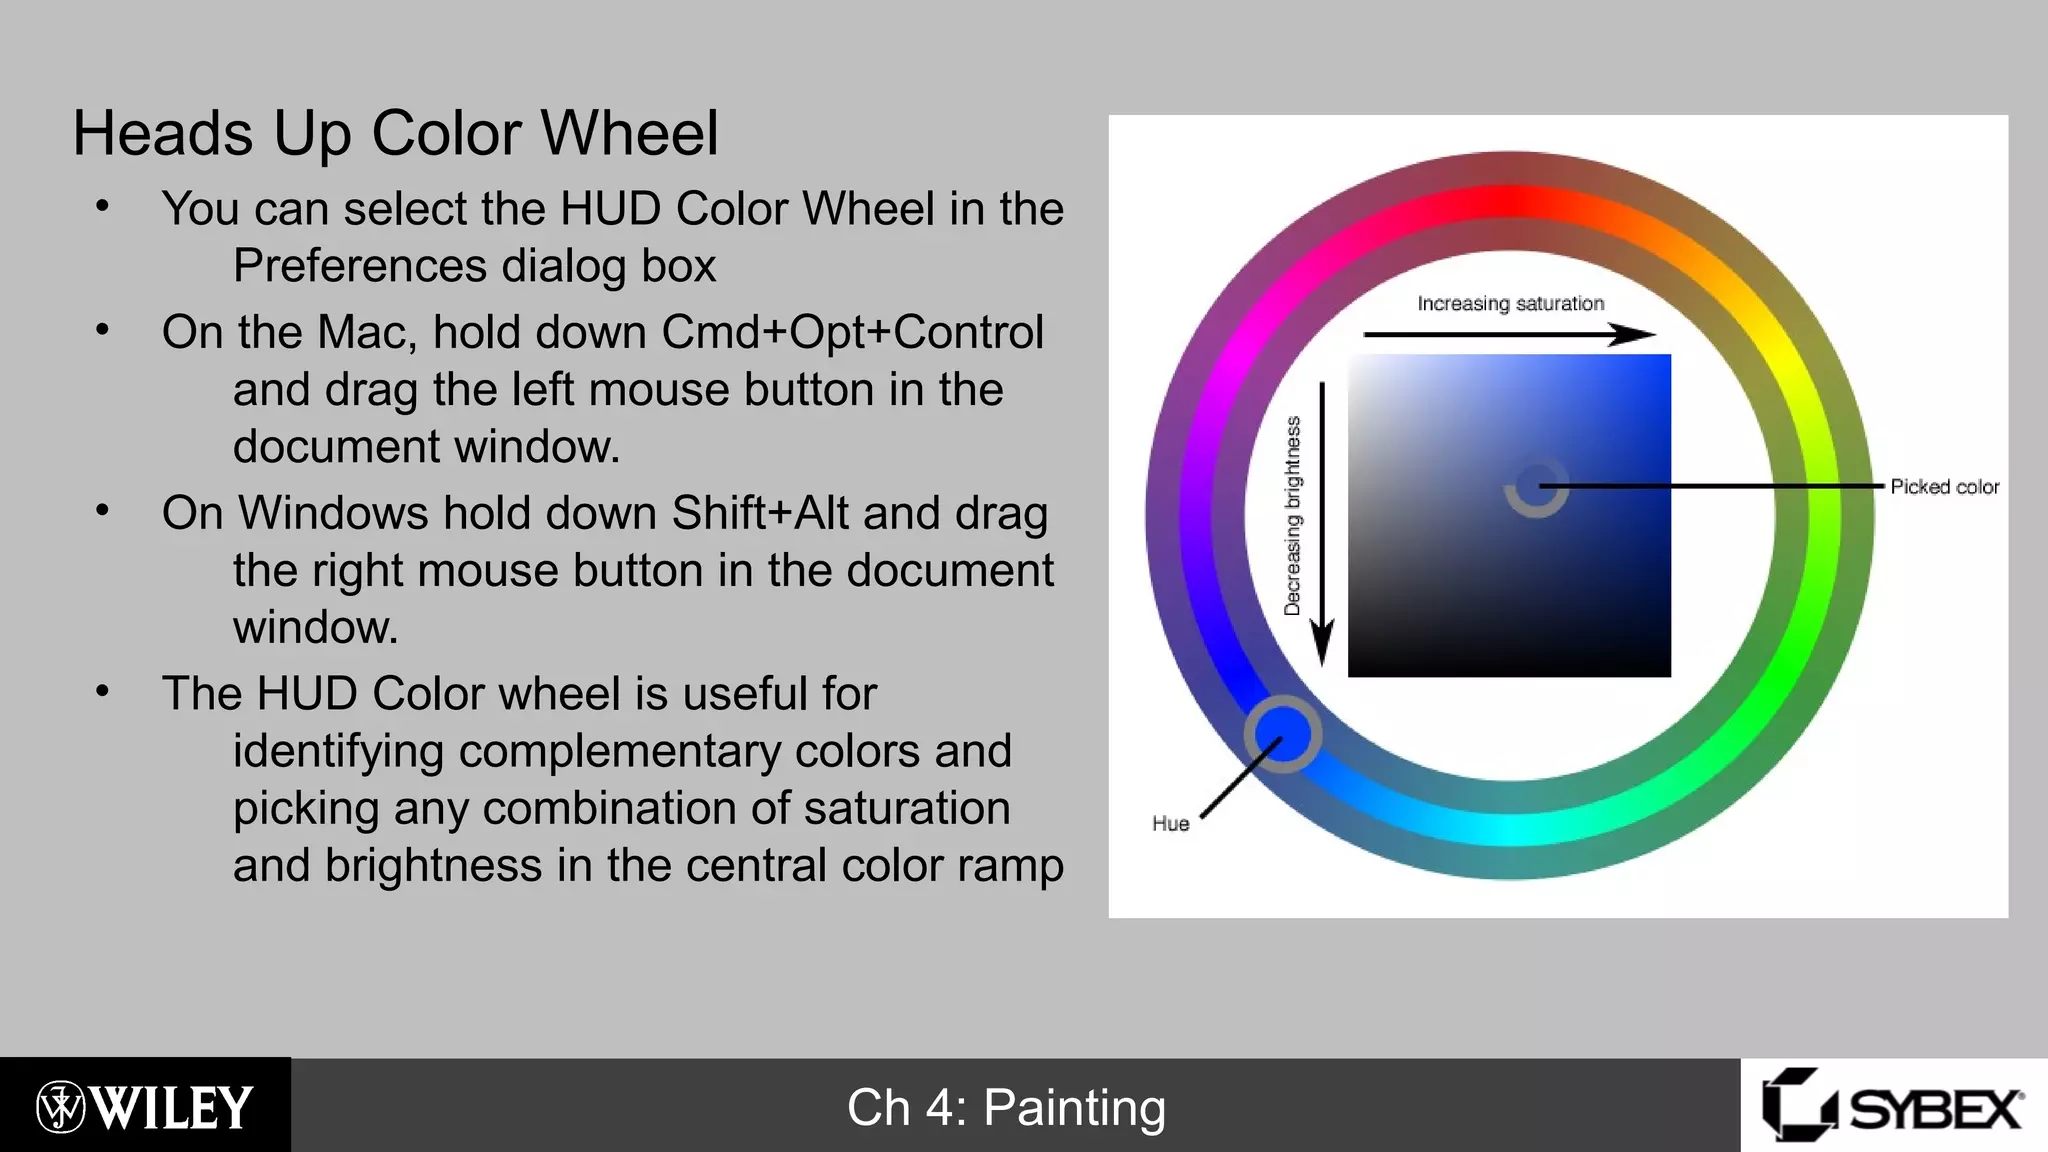
Heads Up Color Wheel
• You can select the HUD Color Wheel in the
Preferences dialog box
• On the Mac, hold down Cmd+Opt+Control
and drag the left mouse button in the
document window.
• On Windows hold down Shift+Alt and drag
the right mouse button in the document
window.
• The HUD Color wheel is useful for
identifying complementary colors and
picking any combination of saturation
and brightness in the central color ramp
Ch 4: Painting
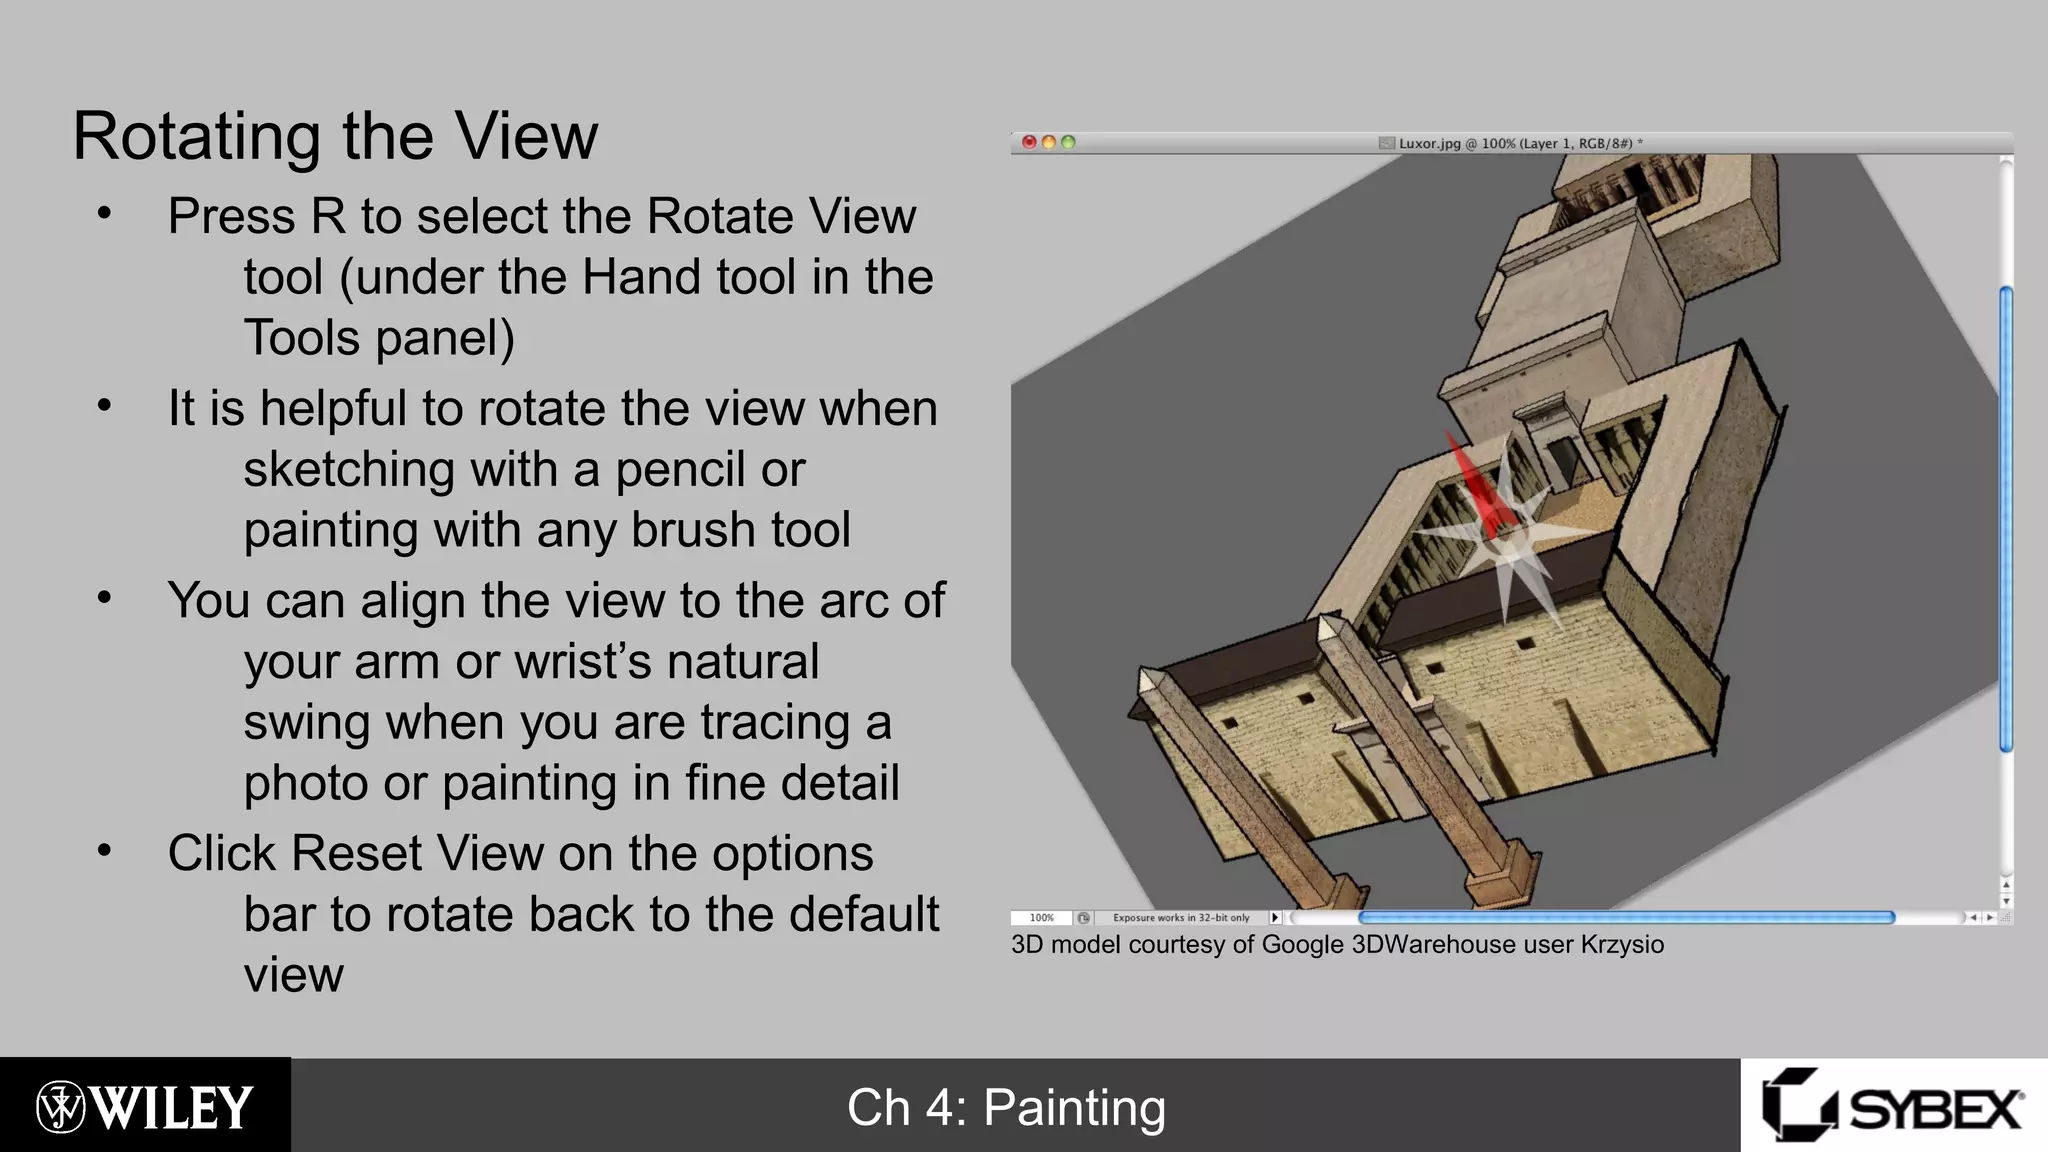
Rotating the View
• Press R to select the Rotate View
tool (under the Hand tool in the
Tools panel)
• It is helpful to rotate the view when
sketching with a pencil or
painting with any brush tool
• You can align the view to the arc of
your arm or wrist’s natural
swing when you are tracing a
photo or painting in fine detail
• Click Reset View on the options
bar to rotate back to the default
view
3D model courtesy of Google 3DWarehouse user Krzysio
Ch 4: Painting
Eraser Tool
• Use the Eraser to paint in the
background color
• The Eraser tool has three modes:
pencil, brush, and block
• Pencil mode is good for removing
one pixel at a time
• Brush mode supports partial erasure
when the brush has reduced
hardness
• Block mode is good for erasing rows
and/or columns while holding
Shift
Ch 4: Painting
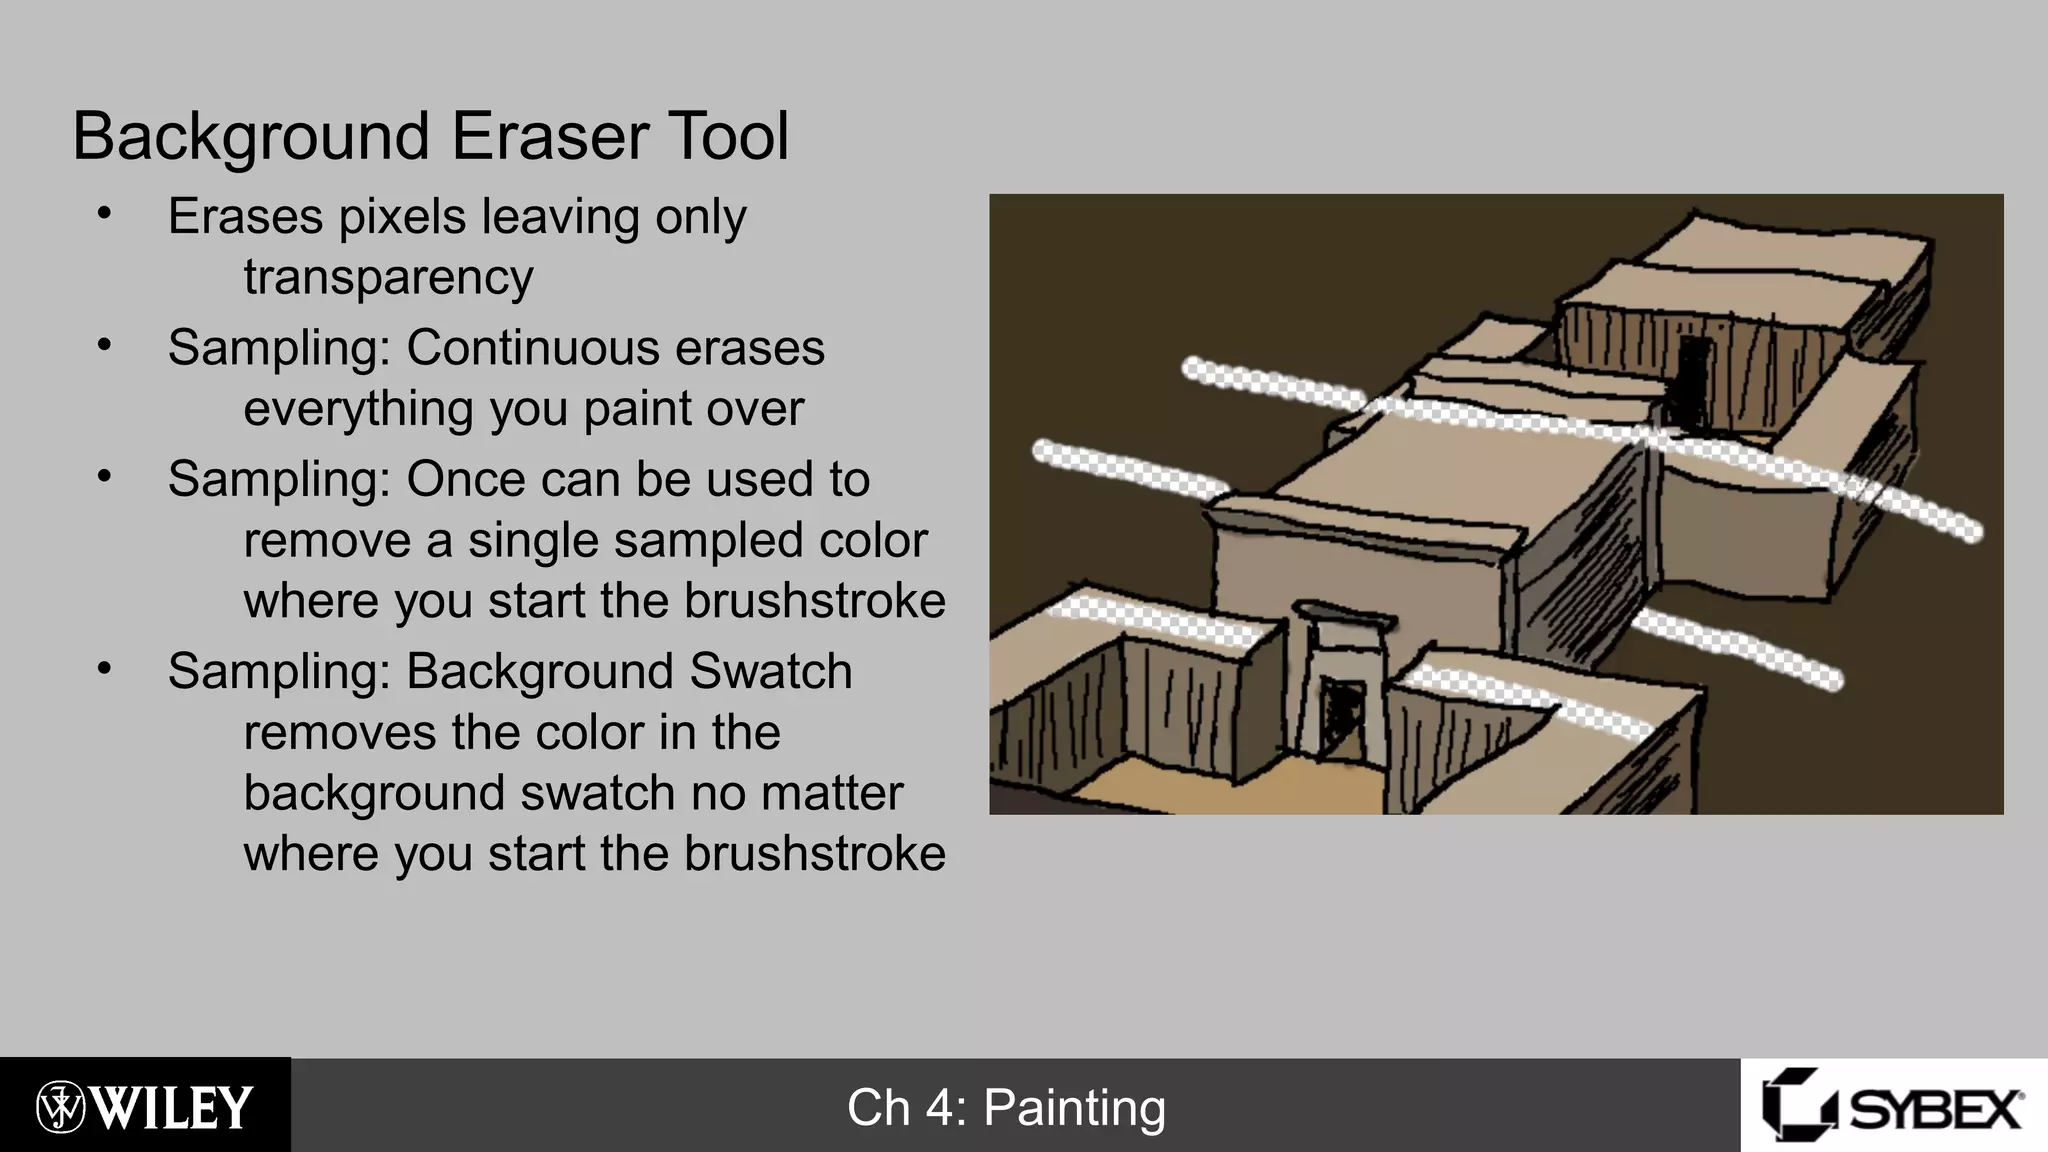
Background Eraser Tool
• Erases pixels leaving only
transparency
• Sampling: Continuous erases
everything you paint over
• Sampling: Once can be used to
remove a single sampled color
where you start the brushstroke
• Sampling: Background Swatch
removes the color in the
background swatch no matter
where you start the brushstroke
Ch 4: Painting
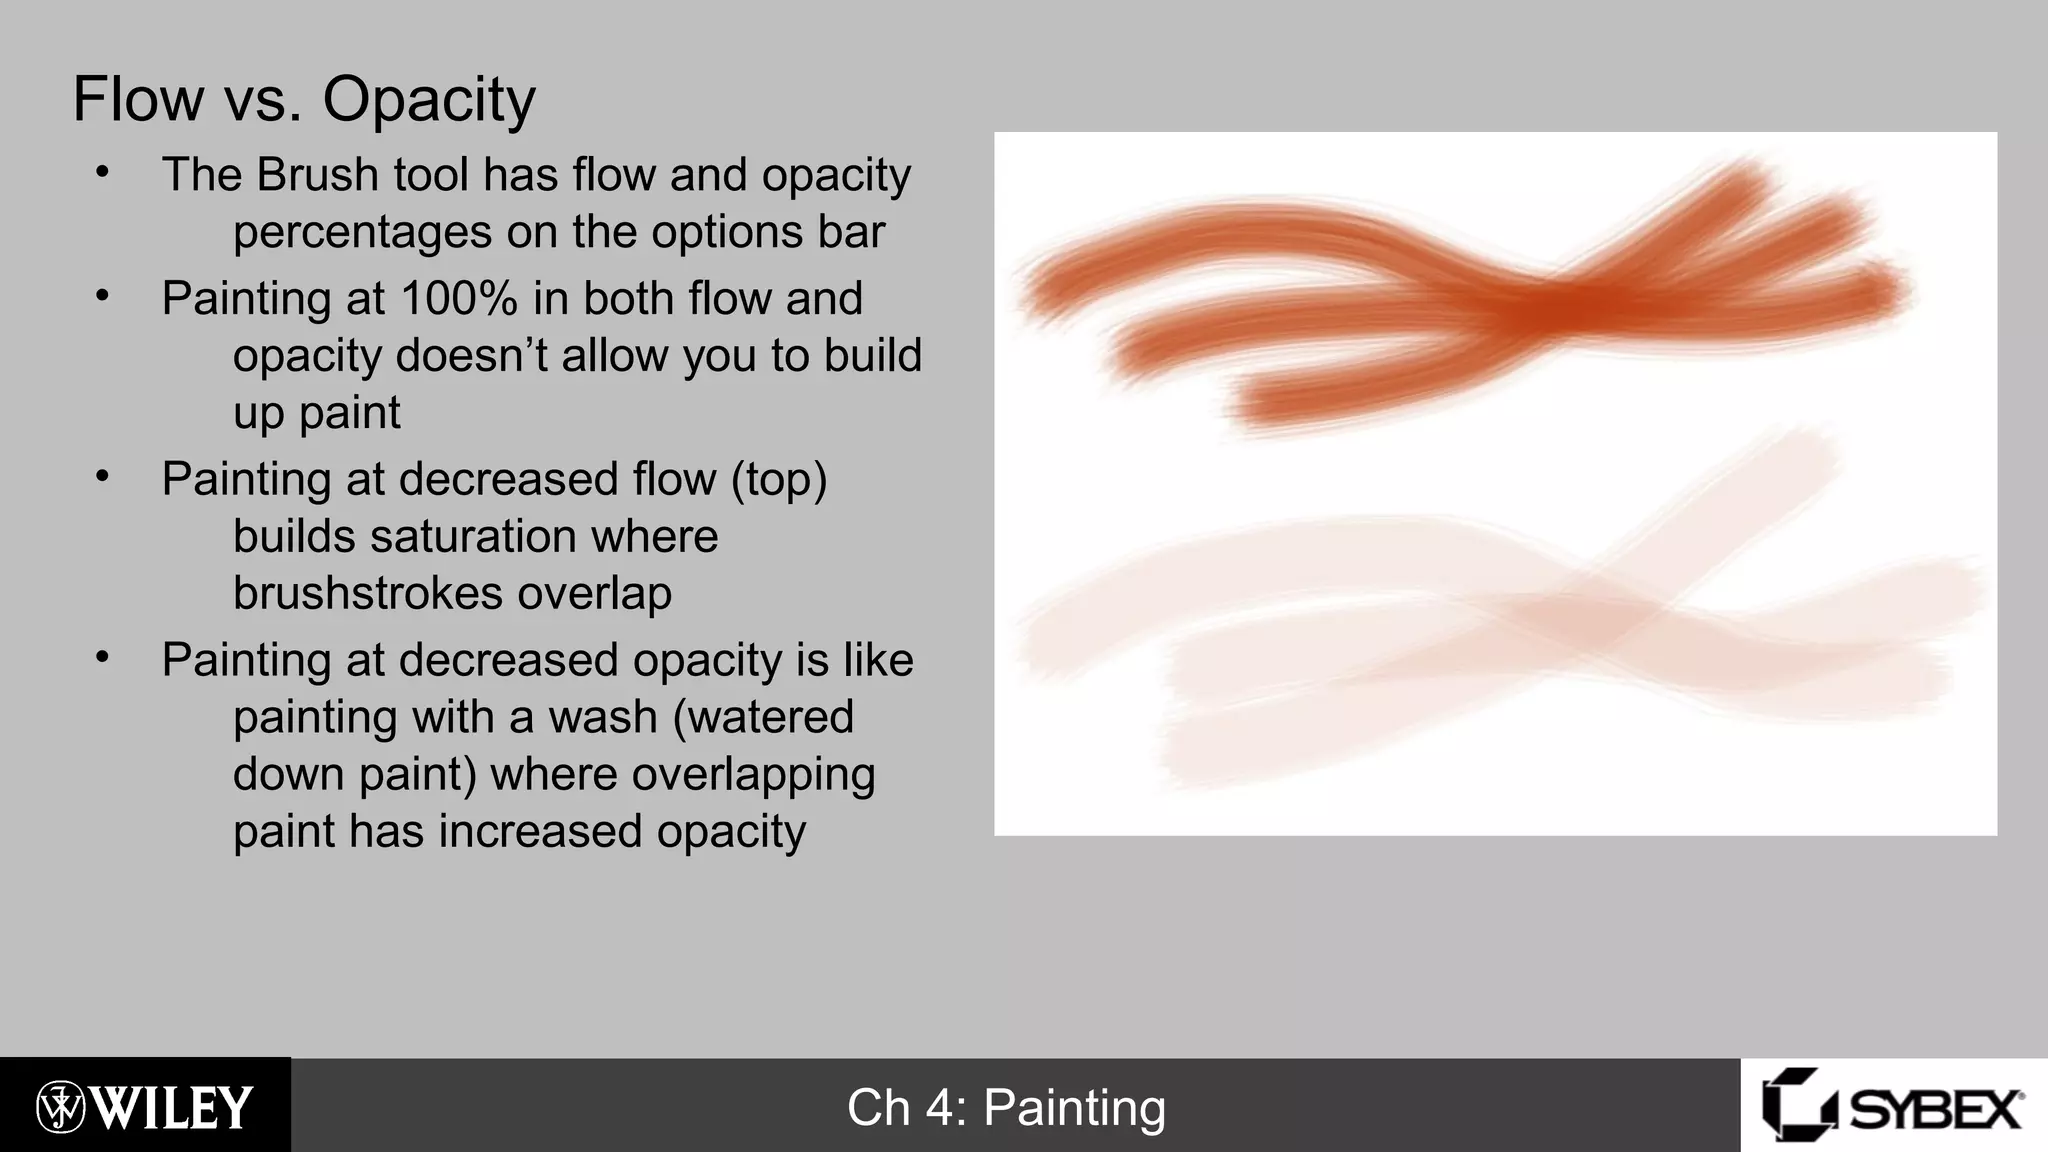
Flow vs. Opacity
• The Brush tool has flow and opacity
percentages on the options bar
• Painting at 100% in both flow and
opacity doesn’t allow you to build
up paint
• Painting at decreased flow (top)
builds saturation where
brushstrokes overlap
• Painting at decreased opacity is like
painting with a wash (watered
down paint) where overlapping
paint has increased opacity
Ch 4: Painting
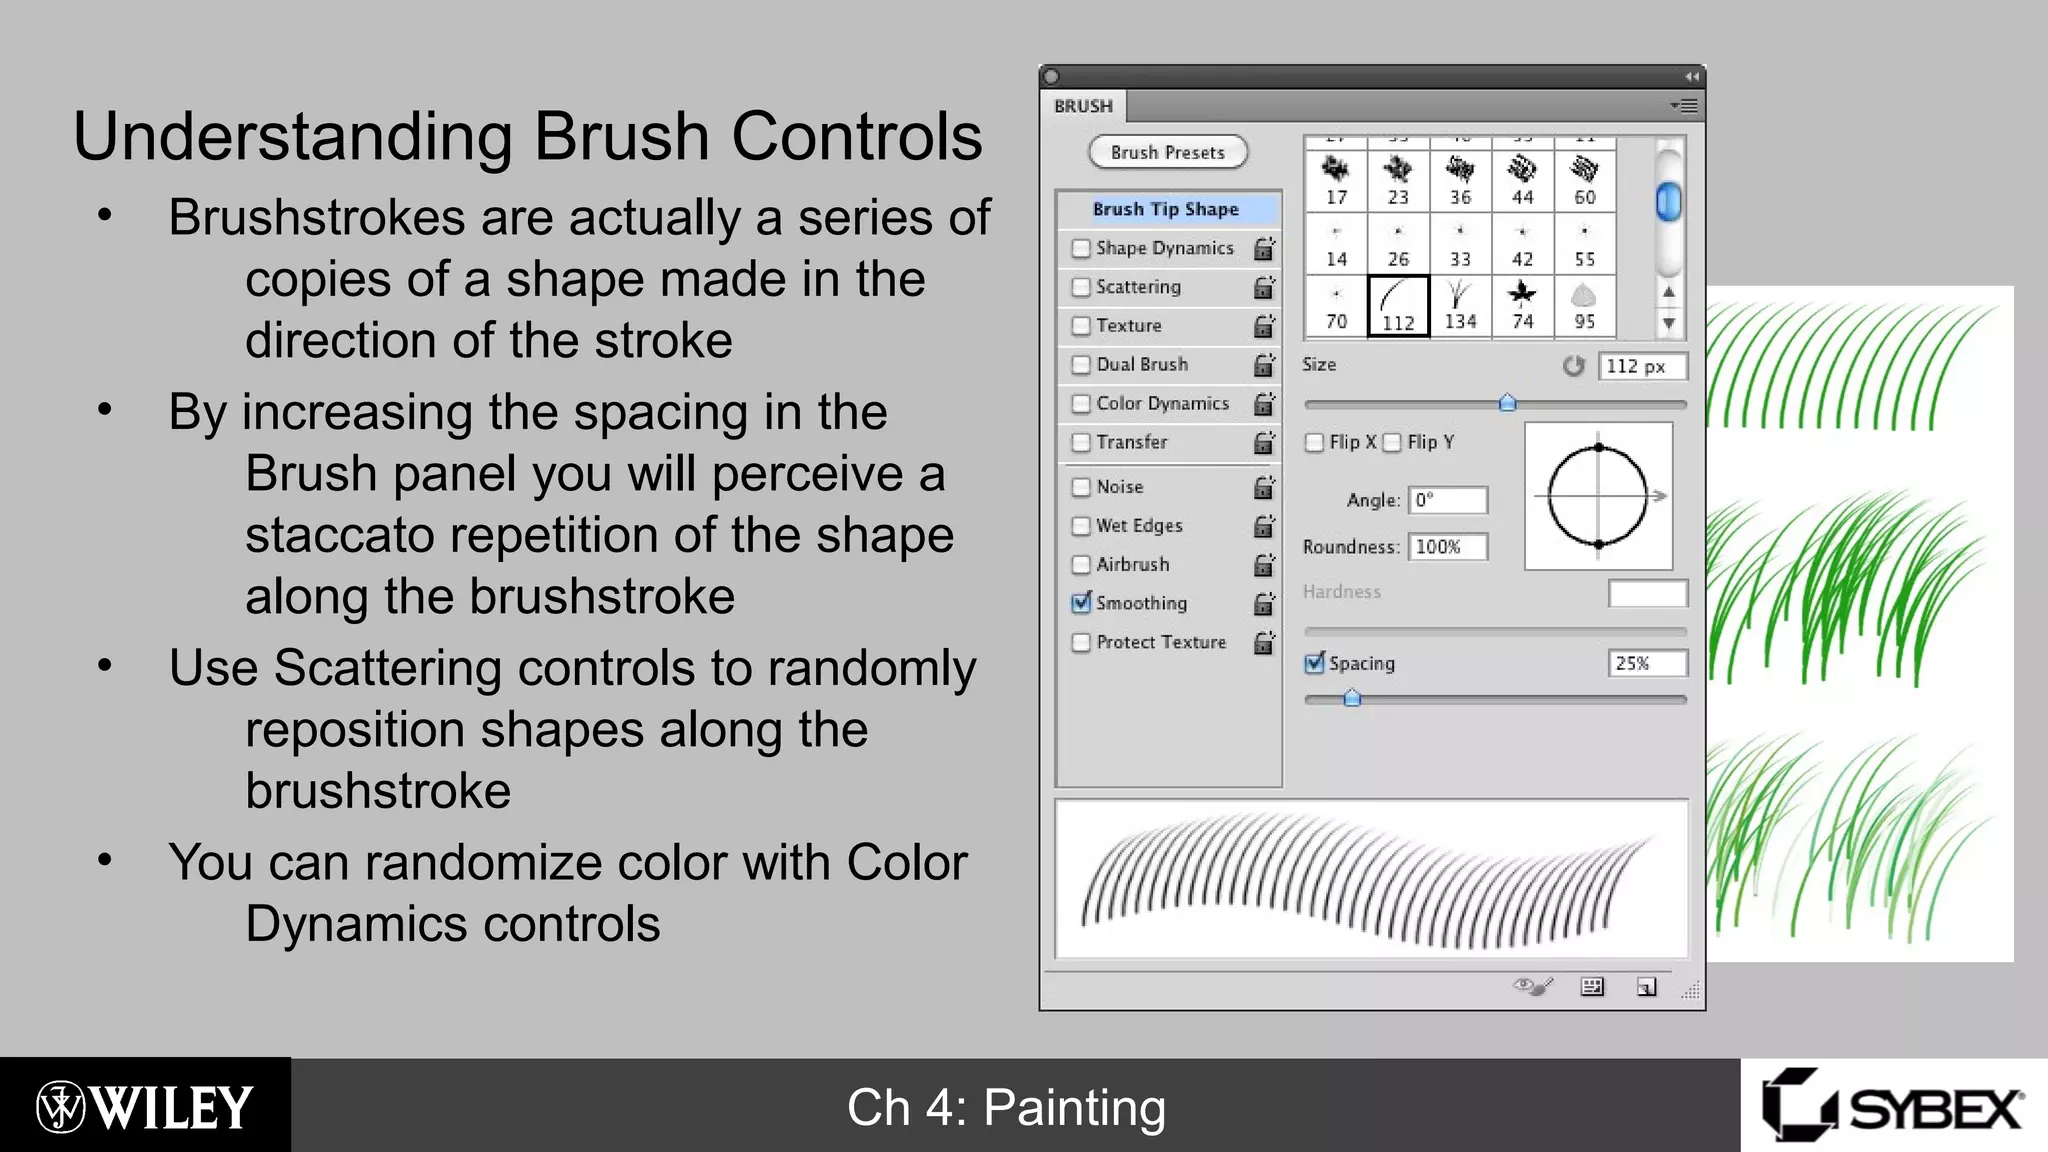
Understanding Brush Controls
• Brushstrokes are actually a series of
copies of a shape made in the
direction of the stroke
• By increasing the spacing in the
Brush panel you will perceive a
staccato repetition of the shape
along the brushstroke
• Use Scattering controls to randomly
reposition shapes along the
brushstroke
• You can randomize color with Color
Dynamics controls
Ch 4: Painting
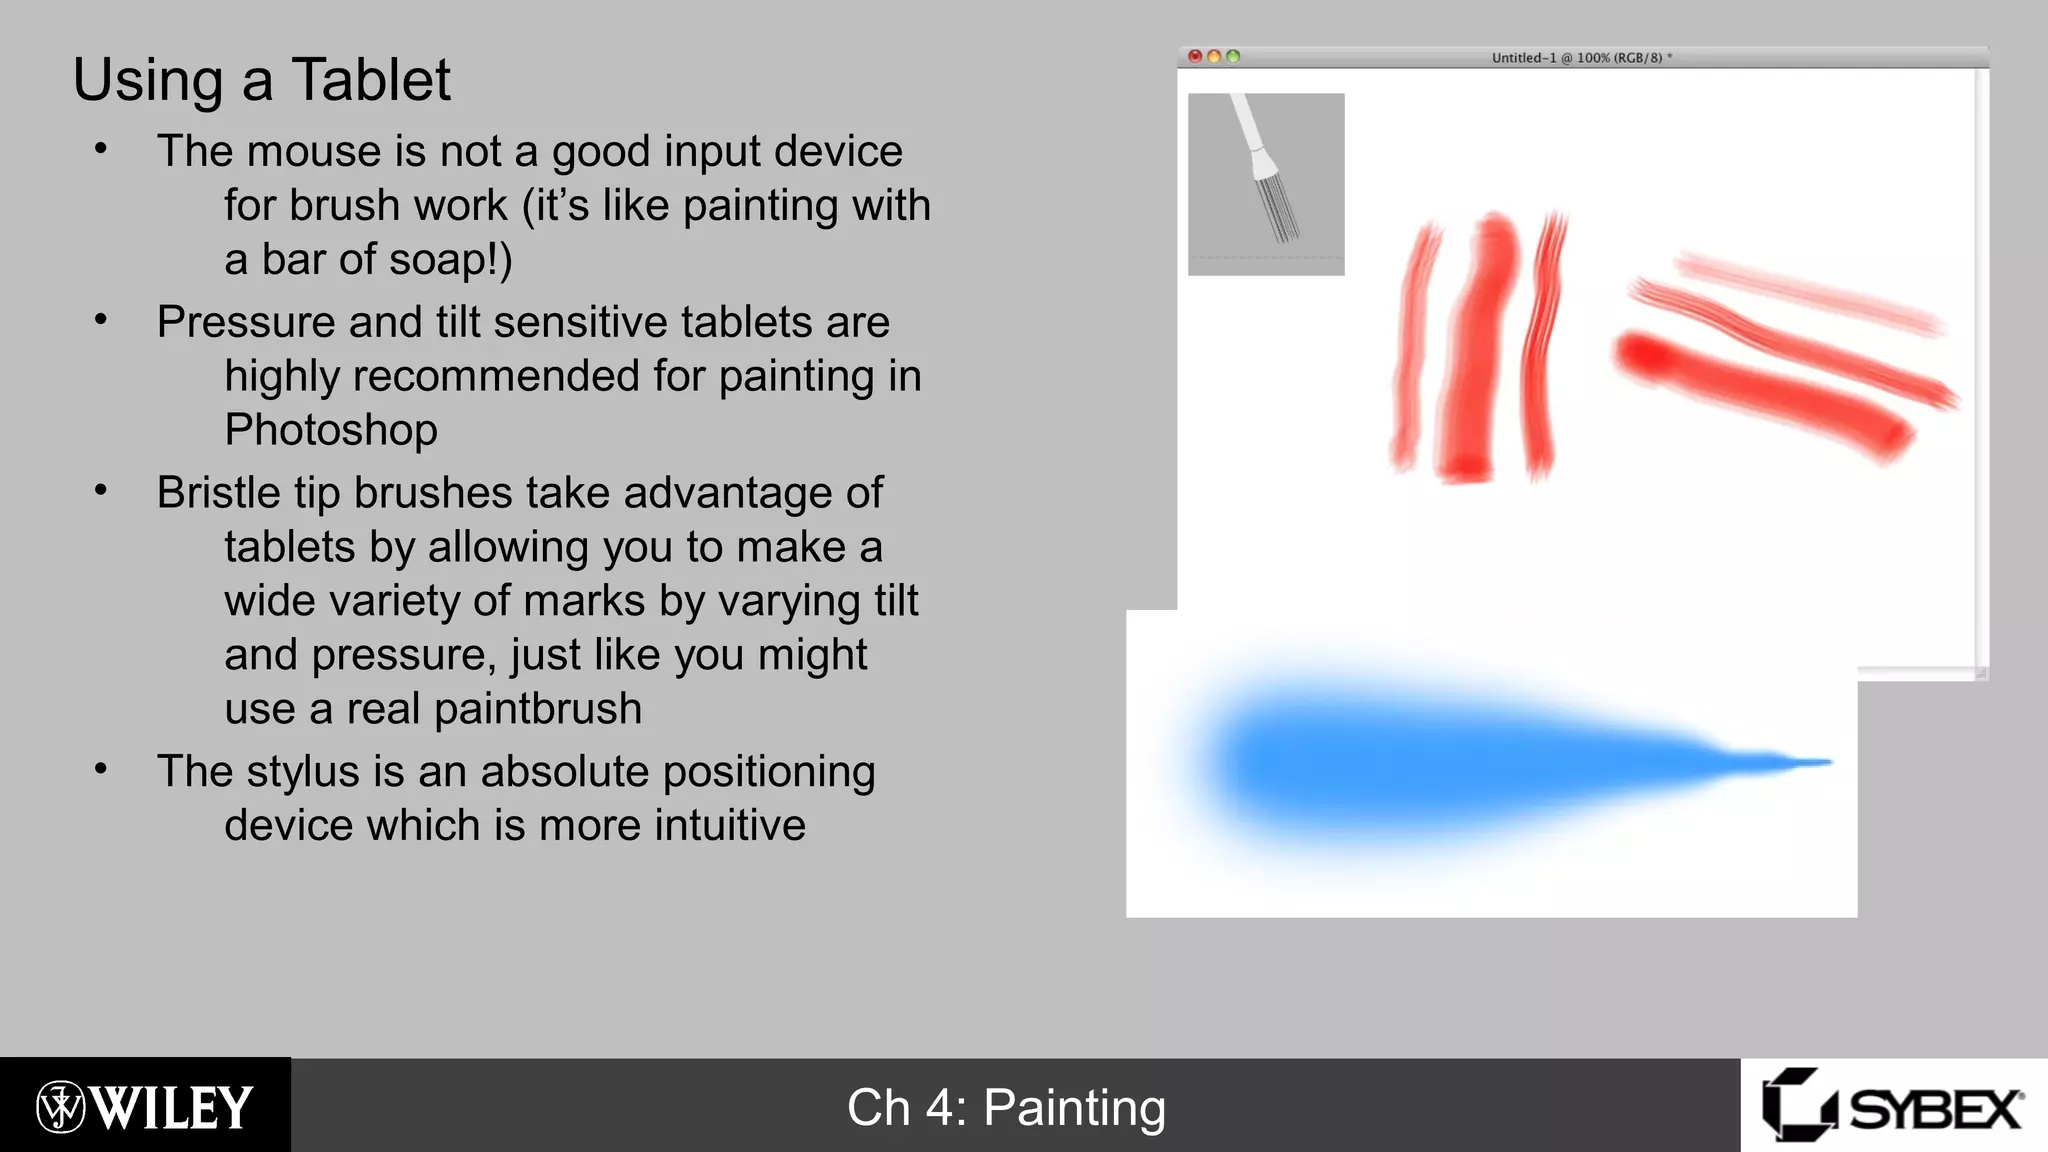
Using a Tablet
• The mouse is not a good input device
for brush work (it’s like painting with
a bar of soap!)
• Pressure and tilt sensitive tablets are
highly recommended for painting in
Photoshop
• Bristle tip brushes take advantage of
tablets by allowing you to make a
wide variety of marks by varying tilt
and pressure, just like you might
use a real paintbrush
• The stylus is an absolute positioning
device which is more intuitive
Ch 4: Painting
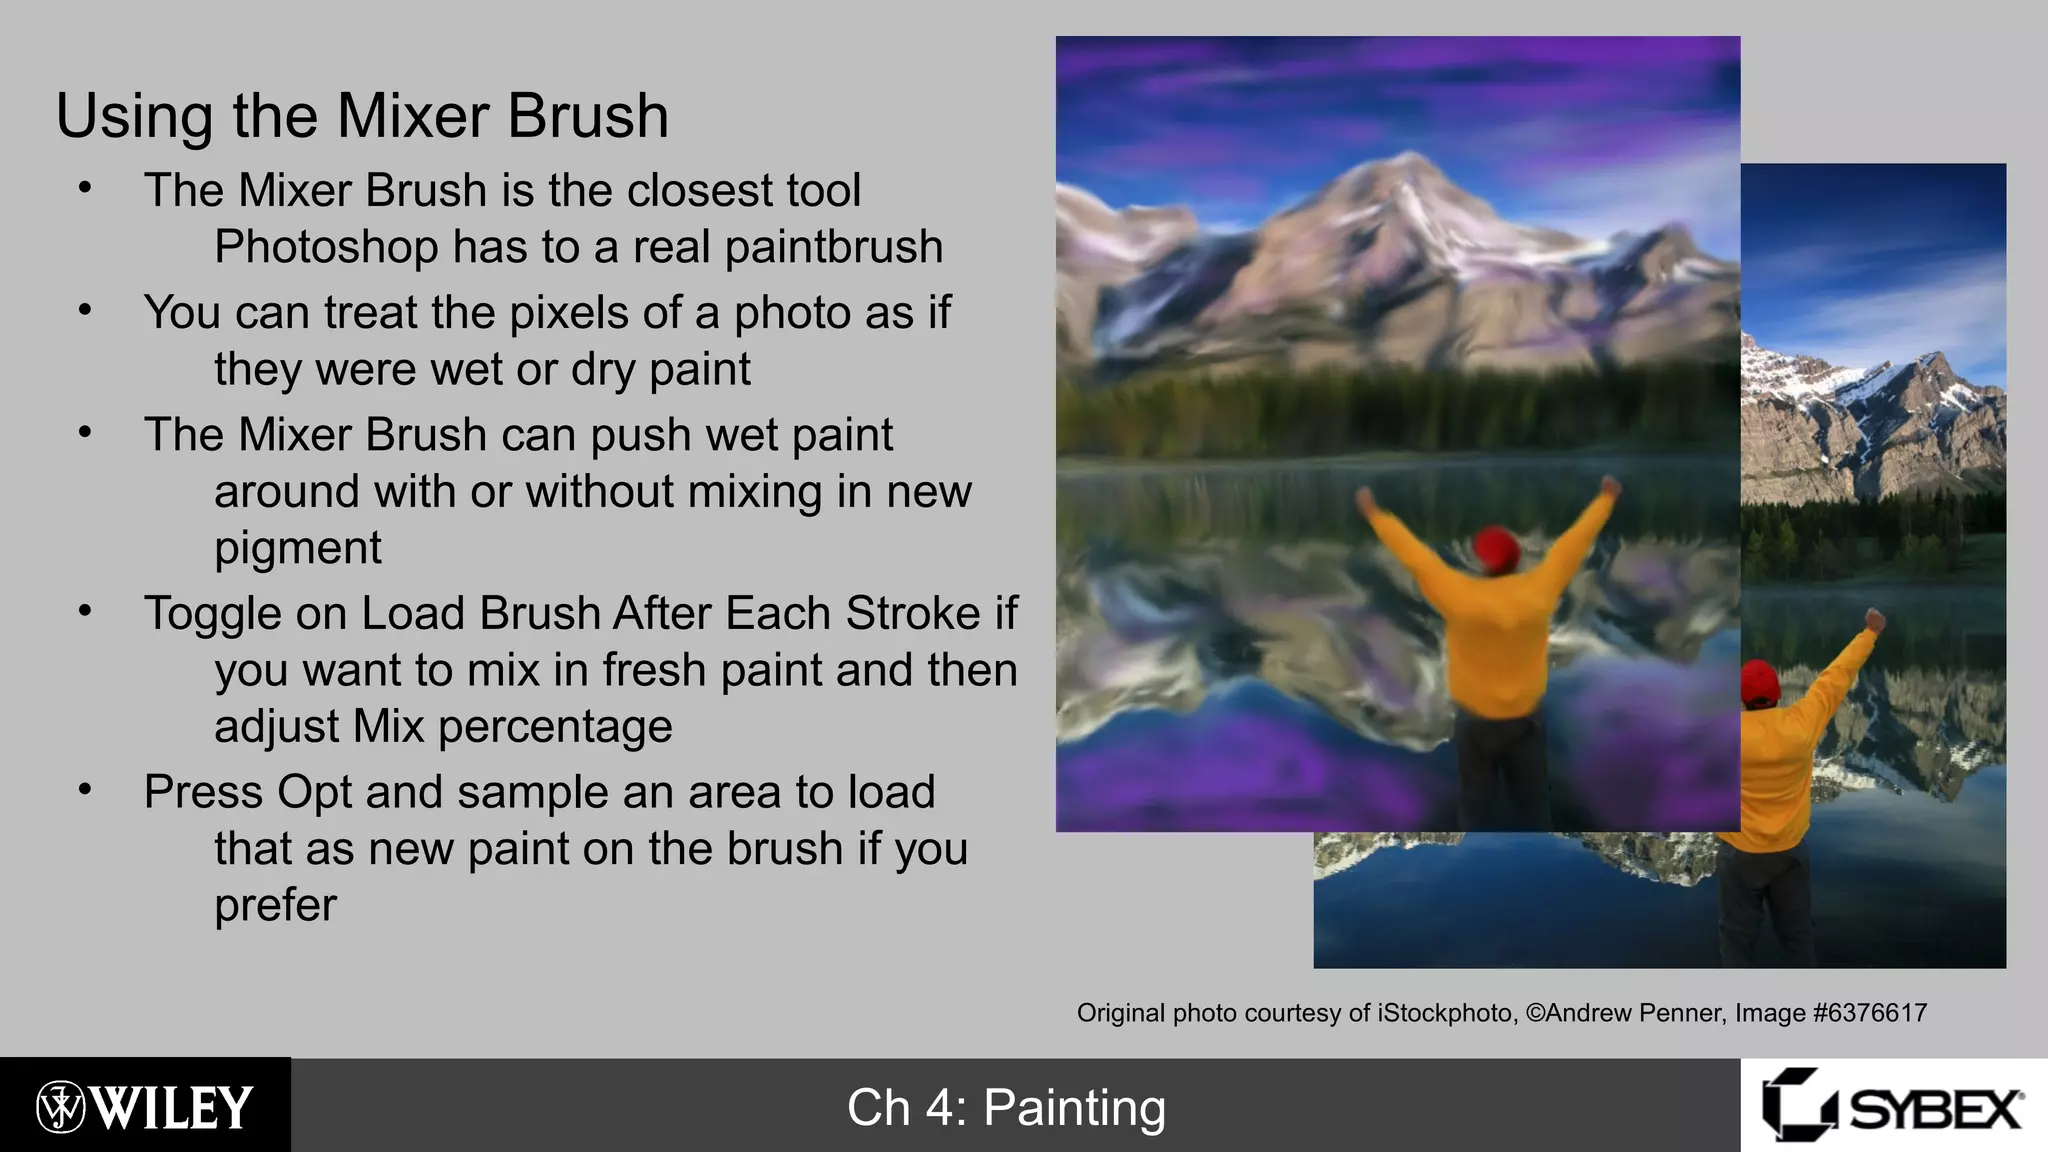
Using the Mixer Brush
• The Mixer Brush is the closest tool
Photoshop has to a real paintbrush
• You can treat the pixels of a photo as if
they were wet or dry paint
• The Mixer Brush can push wet paint
around with or without mixing in new
pigment
• Toggle on Load Brush After Each Stroke if
you want to mix in fresh paint and then
adjust Mix percentage
• Press Opt and sample an area to load
that as new paint on the brush if you
prefer
Original photo courtesy of iStockphoto, ©Andrew Penner, Image #6376617

Chapter04

  • 1.
    Ch 4: Painting PhotoshopCS6 Essentials By Scott Onstott
  • 2.
    Ch 4: Painting UnderstandingHSB Color • Hue is what we think of as colors of the rainbow • Saturation refers to how much hue is present • Brightness refers to the light intensity • Tints have full brightness but low saturation • Shades have full saturation but decreased brightness • Desaturated color is grayscale, having only variation in brightness
  • 3.
    Ch 4: Painting HeadsUp Color Wheel • You can select the HUD Color Wheel in the Preferences dialog box • On the Mac, hold down Cmd+Opt+Control and drag the left mouse button in the document window. • On Windows hold down Shift+Alt and drag the right mouse button in the document window. • The HUD Color wheel is useful for identifying complementary colors and picking any combination of saturation and brightness in the central color ramp
  • 4.
    Ch 4: Painting Rotatingthe View • Press R to select the Rotate View tool (under the Hand tool in the Tools panel) • It is helpful to rotate the view when sketching with a pencil or painting with any brush tool • You can align the view to the arc of your arm or wrist’s natural swing when you are tracing a photo or painting in fine detail • Click Reset View on the options bar to rotate back to the default view 3D model courtesy of Google 3DWarehouse user Krzysio
  • 5.
    Ch 4: Painting EraserTool • Use the Eraser to paint in the background color • The Eraser tool has three modes: pencil, brush, and block • Pencil mode is good for removing one pixel at a time • Brush mode supports partial erasure when the brush has reduced hardness • Block mode is good for erasing rows and/or columns while holding Shift
  • 6.
    Ch 4: Painting BackgroundEraser Tool • Erases pixels leaving only transparency • Sampling: Continuous erases everything you paint over • Sampling: Once can be used to remove a single sampled color where you start the brushstroke • Sampling: Background Swatch removes the color in the background swatch no matter where you start the brushstroke
  • 7.
    Ch 4: Painting Flowvs. Opacity • The Brush tool has flow and opacity percentages on the options bar • Painting at 100% in both flow and opacity doesn’t allow you to build up paint • Painting at decreased flow (top) builds saturation where brushstrokes overlap • Painting at decreased opacity is like painting with a wash (watered down paint) where overlapping paint has increased opacity
  • 8.
    Ch 4: Painting UnderstandingBrush Controls • Brushstrokes are actually a series of copies of a shape made in the direction of the stroke • By increasing the spacing in the Brush panel you will perceive a staccato repetition of the shape along the brushstroke • Use Scattering controls to randomly reposition shapes along the brushstroke • You can randomize color with Color Dynamics controls
  • 9.
    Ch 4: Painting Usinga Tablet • The mouse is not a good input device for brush work (it’s like painting with a bar of soap!) • Pressure and tilt sensitive tablets are highly recommended for painting in Photoshop • Bristle tip brushes take advantage of tablets by allowing you to make a wide variety of marks by varying tilt and pressure, just like you might use a real paintbrush • The stylus is an absolute positioning device which is more intuitive
  • 10.
    Ch 4: Painting Usingthe Mixer Brush • The Mixer Brush is the closest tool Photoshop has to a real paintbrush • You can treat the pixels of a photo as if they were wet or dry paint • The Mixer Brush can push wet paint around with or without mixing in new pigment • Toggle on Load Brush After Each Stroke if you want to mix in fresh paint and then adjust Mix percentage • Press Opt and sample an area to load that as new paint on the brush if you prefer Original photo courtesy of iStockphoto, ©Andrew Penner, Image #6376617