Have you ever come across this line "use strict" written on top of the code and wondered what this does and what is the use of this line?
Only by writing this one single line on the top of the code will allow us to write better programs and also make less mistakes in our code. Let us now understand how will that be possible.
JavaScript is a very flexible language and often it allows us to get away with some of the mistakes or bad syntaxes without giving any sort of warning or error messages. But by using strict mode, the bad syntaxes are converted into errors which help in reducing the amount of unexpected code behaviors and leading to a more secure code.
Applying strict mode
- Strict mode can be applied to the entire file by writing "use strict" on top of the file
"use strict"
const username="John"
- Strict mode can be applied on individual functions by writing "use strict" in the first line of the function block.
function user {
"use strict"
const username="John";
}
But strict mode cannot be applied to block statements. For example, in the below code snippet, strict mode will not be applied within this block of code.
if (true){
    "use strict"
    a=23;
    console.log(a) // output: 23 use strict not applied here
}
Let us now look at some examples where using the strict mode can help us write more efficient code and avoid unexpected errors
- In strict mode we cannot have undeclared variables. Variables can be assigned only after they are declared using the let, const or var keywords. But when strict mode is not used, and if any variable assignment is done without declaring them first, by default a new global variable is created. This might cause an issue if accidently someone misspells the already declared variable which might lead to the creation of a new global variable.
"use strict"
username ="June"    //  this throws a ReferenceError: username is not defined
In the above example, we have to first declare the variable and then assign the value to it. This code can be fixed by declaring the username and then assigning value to it as displayed below.
"use strict"
const username="June"
- In strict mode, we cannot assign values to read only properties. In normal JavaScript, when we assign values to read only properties, we do not get any warning messages or errors. But while using strict mode, we get an error when we try to assign values to read only properties, non writable properties or non existing objects / variables.
"use strict"
const undefined=23   // this throws a SyntaxError: Identifier 'undefined' has already been declared
In the above code, when we try to assign value to the reserved keyword undefined, we get a syntax error. Where as if we do not use the strict mode, the above assignment will not give any warning or error message.
- In strict mode, deleting a variable is not allowed. This will help us from accidently deleting any variables from the program. Variables can be deleted from the programs not using strict mode.
"use strict"
const a=21
delete a         // throws a SyntaxError: Delete of an unqualified identifier in strict mode
- In strict mode, using eval will not introduce new variables in the surrounding scope. Eval only creates variables for the code being evaluated for strict mode. In normal code, eval introduces that variable in the surrounding / global scope.
"use strict"
eval("var x")     // this x will not be created as a separate variable for the global scope
- Duplicate function parameter names are not allowed in strict mode. In normal code when we have duplicate function parameter names, the last duplicated argument hides the previous value for that same parameter name. But in strict mode, when there are duplicate parameter names, they give syntax errors.
"use strict"
function example (a,b,b,c){    // this gives a SyntaxError: Duplicate parameter name not allowed in this context
return [a,b,c]
}
console.log(example(22,24,32,55))
//  without using strict mode

function example (a,b,b,c){
return [a,b,c]
}
console.log(example(22,24,32,55))   // output: [22, 32, 55]
Here we have seen some of the examples where strict mode can be used to avoid unexpected behaviors and write more secure code. Using strict mode has a lot of security advantages and also it allows developers to write a better code.
Happy Coding !!
]]>While designing a webpage, we often require some elements to be positioned in a certain manner. This can be achieved by using the CSS position property. Understanding how the elements are being placed using the CSS position property can be a bit confusing in the beginning but once you get the hang of it, designing the webpages becomes so much easier.
As the name suggests, the position property is used to set how the element is positioned in a document. The various positions are Static, Relative, Absolute, Sticky and Fixed. Default position value for an element is Static. Let us look at each of these positions with the help of examples.
Static
All elements by default have position value as static and it is the normal flow of the document. The top, right, bottom, left and z-index properties do not have any effect on static positioned elements.
HTML
<div class="parent__container">
      <div class="square square1">Square 1</div>
</div>
CSS
.parent__container {
  background-color: rgb(208, 204, 241);
}

.square {
  width: 100px;
  height: 100px;
  border: 1px solid black;
  display: inline-block;
  margin: 0.8rem;
}

.square1 {
  background-color: rgb(110, 223, 110);
  position: static;
}
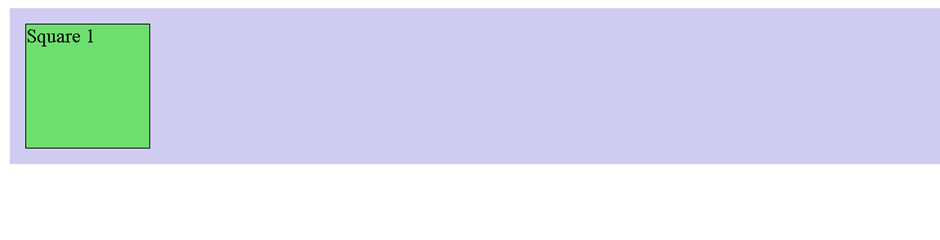
In the above example, we have applied position: static to square 1.
Relative
On applying the position value as relative to any element, initially no visible difference will be visible since it is positioned according to the normal flow of the documents. Once the values for top, right, bottom or left are provided, the element is then shifted based on the values relative to its own original position i.e. relative to itself.
This does not affect the position of the other elements on the screen and the element having position as relative still occupies the same space as it would have if its position were static. So there will be a visible empty space where the element initially was before the offset values were set.
HTML
<div class="parent__container">
      <div class="square square1">Square 1</div>
      <div class="square square2">Square 2</div>
      <div class="square square3">Square 3</div>
</div>
CSS
.square1 {
  background-color: rgb(110, 223, 110);
}

.square2 {
  background-color: rgb(240, 240, 90);
  position: relative;
}

.square3 {
  background-color: rgb(243, 122, 243);
}
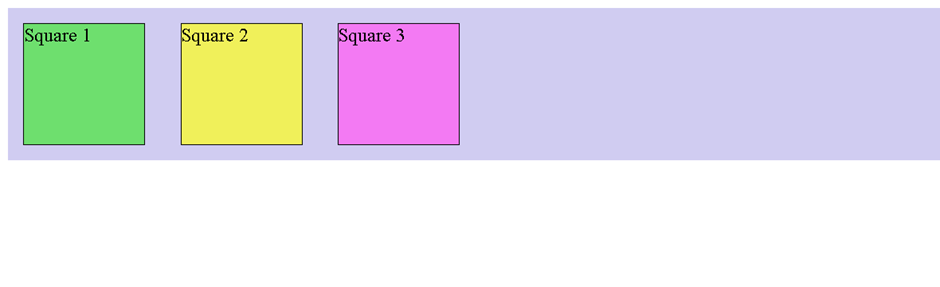
In the above example, we have applied position: relative to square 2 and as we can see that visually we cannot see any difference in the position of square 2 yet.
Now we have added the top and left offset values to square2.
.square2 {
  background-color: rgb(240, 240, 90);
  position: relative;
  top: 2rem;
  left: 4rem;
}
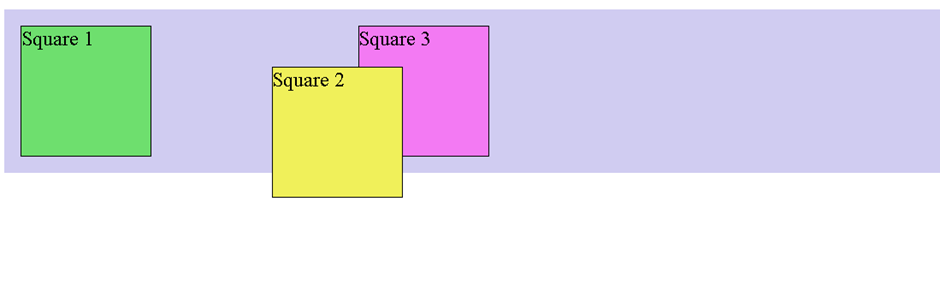
Here we can see that the position of the box has changed relative to its initial position and it is shifted down by 2 rem and shifted right by 2 rem based on the values provided for top and left. Also we can see that the position of the surrounding elements are not changed and the space occupied by square 2 is still the same as it was before the offset values were applied.
Absolute
The absolute positioned elements are removed from the normal flow of the document and no space is created for that element in the page layout. The absolute positioned elements are placed based on the values of top, right, bottom and left with respect to their nearest parent elements having position as relative. And if none of the parent elements are positioned, then the absolute positioned element is placed with respect to the page itself. These absolute positioned elements do not affect the position of the other elements.
CSS
.parent__container {
  background-color: rgb(208, 204, 241);
  position: relative;
}

.square1 {
  background-color: rgb(110, 223, 110);
}

.square2 {
  background-color: rgb(240, 240, 90);
  position: absolute;
  top: 2rem;
  left: 4rem;
}

.square3 {
  background-color: rgb(243, 122, 243);
}
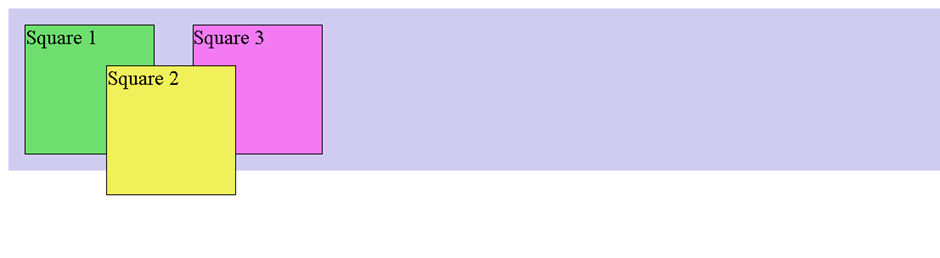
In the above example, we have applied position: absolute to square 2 and we can see that square 2 breaks from the normal document flow and its surrounding element i.e square 3 occupies the space left by the square 2. The square 2 is then positioned based on the top and the left value provided with respect to the nearest parent container having position value as relative
Sticky
The sticky positioned elements initially behave like relative positioned elements but the difference becomes visible when one starts scrolling the web page. On scrolling the page, these elements stick to the screen depending on the value provided for top or bottom. If these values are not provided, then the sticky positioned element will behave like any other relative positioned element and we will not be able to see the sticky effect.
HTML
<h1>This is an example of position sticky</h1>
    <p>
      Lorem ipsum dolor sit, amet consectetur adipisicing elit. Fugit nam, est
      molestiae expedita quisquam eligendi alias exercitationem ab earum, porro
      perferendis unde provident suscipit voluptatum minima voluptas. Velit,
      molestias exercitationem.
    </p>
    <div class="banner">This will stick</div>
    <p>
       Lorem ipsum dolor sit amet, very long text...
    </p>
CSS
.banner {
  background-color: chartreuse;
  position: sticky;
  top: 0;
  height: 10rem;
}
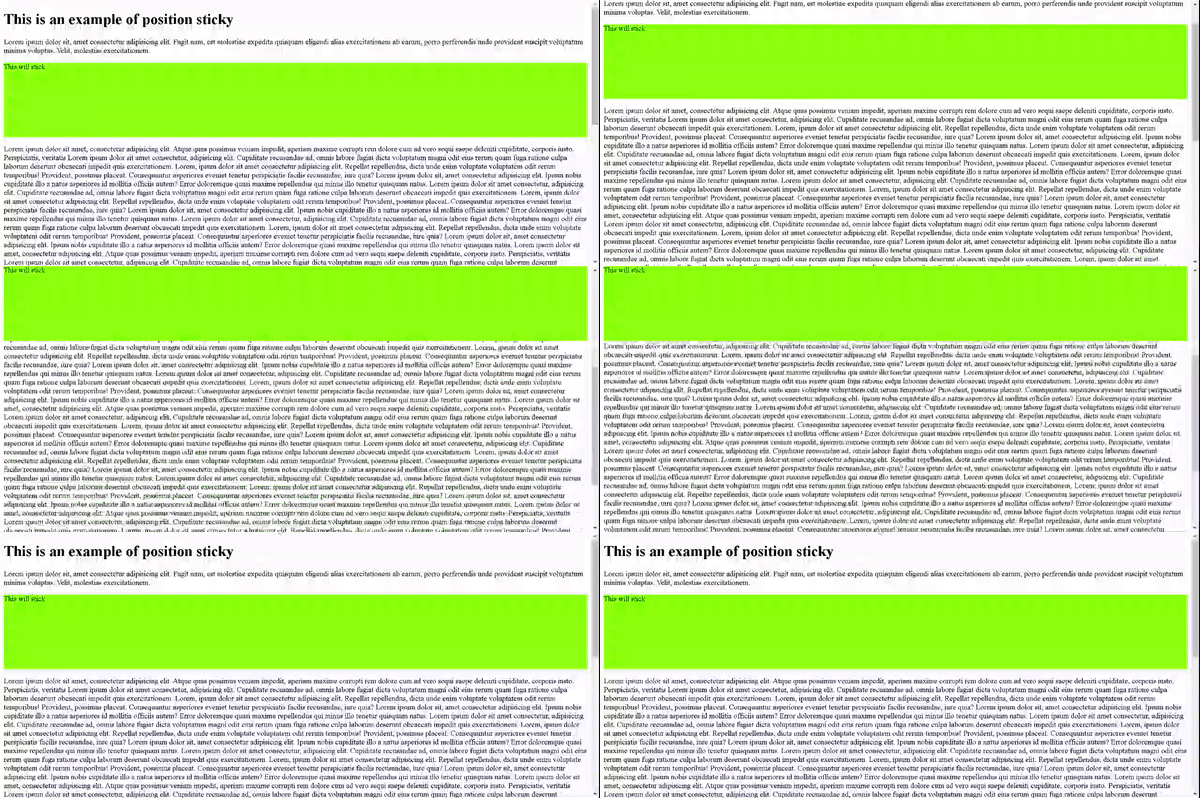
In the above example, we have applied position: sticky to the banner and initially we cannot see any change in its position. But once we start scrolling, we can see that the banner sticks to the screen when it satisfies the condition of top: 0 and once it sticks to the top, then it does not scroll with the other content of the page.
Fixed
As the name suggests, the elements having fixed position will be fixed on the viewport. So even when the page is scrolled, the element will remain fixed in their original position. The fixed positioned elements are placed based on the values of top, right, bottom and left with respect to the viewport. These elements are removed from the normal flow of the document and no space is created for that element in the page layout. The fixed position can be used for page navigation bar which should be visible even when the page is scrolled.
HTML
<div class="banner">This is fixed</div>
    <p class="content">
      Lorem ipsum dolor sit amet, very long text...
    </p>
</div>
CSS
.banner {
  background-color: chartreuse;
  position: fixed;
  top: 0;
  height: 4rem;
  width: 100%;
}

.content {
  margin-top: 5rem;
}
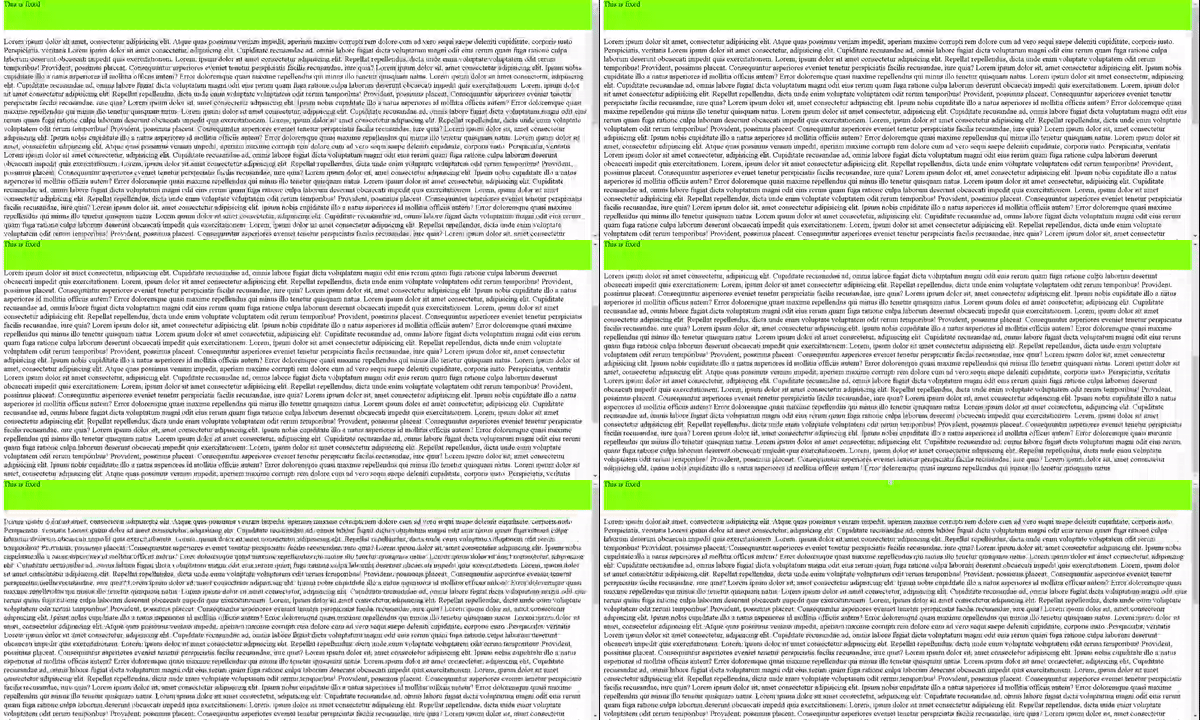
In the above example, we have applied position: fixed to the banner and we can see that on scrolling the page, the banner is fixed on the same position and is not scrolled with the rest of the page. We have given some margin-top to the content since no space is created for the fixed positioned elements in the normal document flow and hence they overlap the other contents on the page. To avoid this overlap, the content is given some margin top so that it is not hidden under the banner.
I hope now you have got some idea about positioning elements. By using a combination of these positions, it becomes very easy to manipulate the elements on the web page to create great web pages.
Happy Coding 😄 !!
]]>Can you predict the output for the below snippets of code?
console.log(item1)
console.log(item2)
var item1;
let item2;
let item3;
console.log(item3)
The answer to the first question is : undefined and Reference error
The answer to the second question is: undefined
Did you get them right?
These above code snippets use the concept of Hoisting and Temporal Dead Zone. Let us have a closer look in what exactly do these terms mean. But before we learn about these concepts let us first look into the basics of var, let and const.
In JavaScript we can declare variables using var, let and const keywords and all these three types have their own differences.
var
Variables declared with var are global scoped and their values can be changed anytime in the program. These variables can be redeclared and reassigned.
var fullname="John"
var fullname="Jane"
The above code snippet works perfectly fine but it is not a good practice to use var. In larger code bases, one can accidently redeclare and change the value of the same variable name and it might lead to unexpected results.
let
To sove the above problem, let was introduced. let does not allow the redeclaration of the same variable and it is block scoped i.e. its scope is limited within that block of code. Variables declared using let can be reassigned.
let fullname=”John”
let fullname=”Jane”   // SyntaxError: Identifier 'fullname' has already been declared
In the above code snippet, when we declare the variable using let and then try to redeclare the same variable, it throws an error.
const
We declare variables with const when we are sure that the value of these variables will not be changed in the code since they cannot be reassigned or redeclared. Also we have to initialize the variables during declaration itself for the variables declared with const keyword otherwise it leads to SyntaxError.
const fullname="John"
Now that we know the basic differences between var, let and const, let us now learn about hoisting.
Hoisting
Whenever any code is executed, before starting the step-by-step execution of the code, JS interpreter first scans the entire code and moves the variable declarations to the top of the scope. Only the declarations are hoisted (moved to the top) and not the initializations. Initializations are only done while the execution of the code. In case of variables declared with var, these variables are hoisted and they are initialized with undefined by default.
Variables declared with let and const are also hoisted but they work a little different than the variables declared using var.
Temporal Dead Zone
The variables which are declared with let and const keyword are not initialized with the default undefined value as in case of var variables. The default value undefined is only stored when the execution reaches the line of code where these variables are declared. If we try to access the variables declared using let or const before they have been declared, then we get a ReferenceError. The lines of code from the start of the block till the line where these variables are declared is known as the Temporal Dead Zone and we will not be able to access the variables before their declaration.
Once let and const variables are declared, they will be initialized with the value undefined and then on trying to access these variables, we will get undefined.
console.log(item1)   //undefined
console.log(item2)  //ReferenceError
var item1;
let item2;
Hence, in the above example, the item1 value is undefined since it is a variable declared using the var keyword which means that it is hoisted and initialized with the value undefined. The item2 gives ReferenceError since item2 is declared using the let keyword and it has not been initialized. It is in the Temporal Dead Zone.
But in the below example, since the variable item3 is accessed after the declaration, the let variable is initialized with the default value undefined and hence it prints undefined.
let item3;
console.log(item3)     // undefined
I hope that these examples have helped you understand the basics of the var, let, const and the concepts of Hoisting and Temporal Dead Zone.
Happy Learning 😊!!
]]>